Table of Contents
ToggleSmart thermostats have evolved from basic programmable boxes into sophisticated home climate managers. Today’s WiFi-enabled models with vibrant color displays offer remote control, learning algorithms, and energy reports that make managing home comfort easier than ever. Whether someone’s replacing a decades-old mechanical thermostat or upgrading from an earlier programmable unit, a WiFi smart color thermostat delivers both immediate convenience and long-term savings. This guide walks through everything needed to choose, install, and optimize one of these devices.
Key Takeaways
- WiFi smart color thermostats reduce heating and cooling costs by 10-30% annually through remote access, learning algorithms, and detailed energy usage reports.
- A WiFi smart color thermostat connects to your smartphone and voice assistants, enabling temperature adjustments from anywhere and integration with home automation ecosystems.
- Most DIY installations take 30-45 minutes and require a C-wire for continuous power; always photograph existing wiring and label all connections before disconnecting the old thermostat.
- Energy savings require proper scheduling—implement a 7-10°F setback during sleep and away hours, leveraging learning features and smart home integrations for optimal automation.
- Pair your smart thermostat with proper insulation, sealed ductwork, and regular HVAC maintenance to maximize savings and ensure the system performs as intended.
- Look for thermostats with high-resolution color displays, dual-band WiFi (2.4 GHz and 5 GHz), multi-user app support, and no subscription fees for basic features.
What Is a WiFi Smart Color Thermostat and How Does It Work?
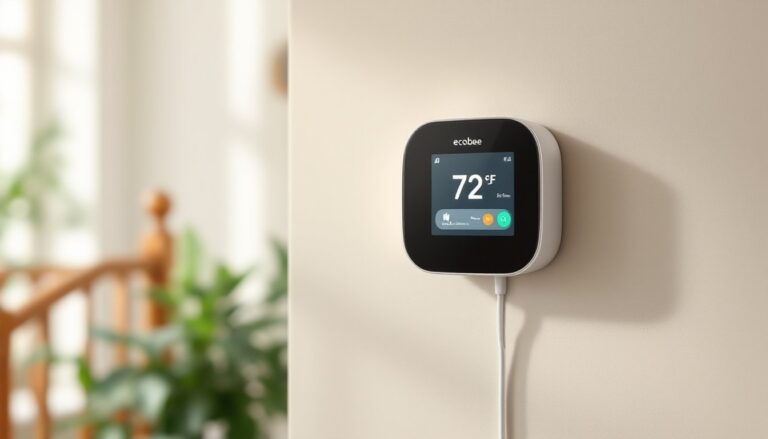
A WiFi smart color thermostat is a programmable climate control device that connects to a home’s wireless network and features a full-color touchscreen display. Unlike older thermostats that rely on mercury switches or simple LED readouts, these units use digital sensors to monitor temperature, humidity, and sometimes occupancy.
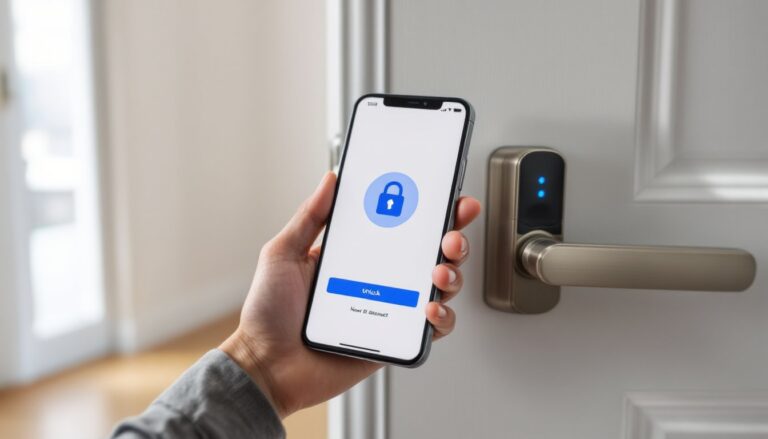
The WiFi connectivity allows the thermostat to communicate with smartphone apps, voice assistants like Amazon Alexa or Google Assistant, and home automation platforms. Users can adjust settings from anywhere, whether they’re at work, on vacation, or just upstairs in bed.
Most models connect to a home’s existing 24-volt HVAC system (standard in most North American homes) using the same low-voltage wiring as the old thermostat. They draw minimal power, often using a C-wire (common wire) for continuous power, though some can charge via the heating/cooling wires themselves.
The color display shows real-time temperature, target settings, current mode (heat, cool, fan), and often weather forecasts or energy usage data. Some advanced units include learning algorithms that observe household patterns and automatically adjust schedules to balance comfort and efficiency.
Key Benefits of Upgrading to a WiFi Smart Color Thermostat
The most immediate payoff is energy savings. According to EPA estimates, programmable thermostats can reduce heating and cooling costs by 10-30% annually when properly configured. Smart models take this further by adjusting automatically based on occupancy, weather, and utility rates.
Remote access means no more coming home to a freezing house or wasting energy cooling an empty one. Forgot to adjust the thermostat before leaving for the weekend? A few taps on a phone fixes it. This flexibility is especially valuable for households with irregular schedules.
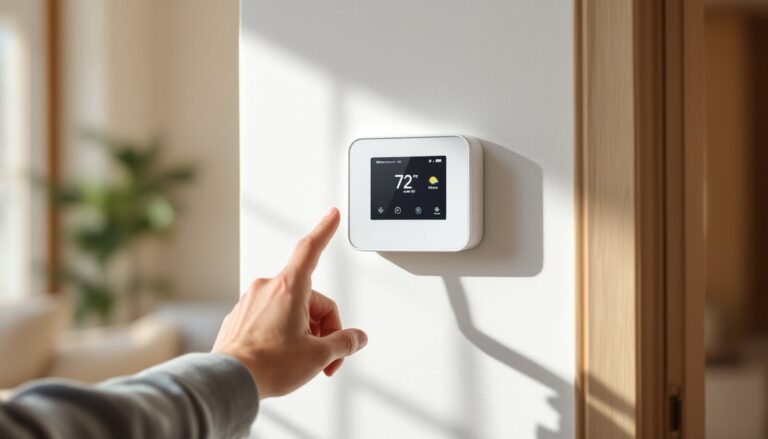
The color touchscreen makes navigation intuitive compared to button-based models. Changing settings, viewing energy reports, or adjusting schedules becomes as straightforward as using a smartphone. Many displays also show indoor humidity levels, outdoor temperature, and maintenance reminders for filter changes.
Integration with smart home ecosystems allows voice control and automation. Someone can create routines where the thermostat lowers the temperature when the security system arms, or voice-command adjustments while cooking dinner with hands full.
Detailed energy usage reports break down heating and cooling patterns by day, week, or month. This transparency helps identify wasteful habits and quantify savings over time, turning abstract efficiency into concrete data.
Top Features to Look for When Choosing Your Smart Thermostat
Not all WiFi smart thermostats are created equal. Understanding which features matter most helps narrow down choices from the dozens available in 2026.
Color Display Technology
The display is the primary interface, so quality matters. Look for screens with high resolution and adjustable brightness, some models automatically dim at night or detect ambient light levels. A touchscreen should be responsive, not laggy, and menus should make sense at a glance.
Some thermostats feature customizable backgrounds or widgets that show weather, time, or photos. While not essential, a well-designed interface reduces frustration during daily use. According to rankings of today’s top models, color clarity and UI simplicity often separate good thermostats from great ones.
Consider screen size relative to viewing distance. A 3.5-inch display works fine if the thermostat is mounted at eye level in a hallway, but might be too small across a large room.
WiFi Connectivity and App Control
WiFi connectivity is the backbone of smart functionality, but implementation varies. The best thermostats support both 2.4 GHz and 5 GHz networks, though most HVAC systems are located where 2.4 GHz provides better range through walls.
The companion mobile app should offer full control, scheduling, mode changes, temperature adjustments, and settings access. Check whether it supports multiple users (useful for families) and whether it sends maintenance alerts like filter reminders or abnormal runtime warnings.
Voice assistant compatibility matters if someone already uses Alexa, Google Assistant, or Siri. Most 2026 models support at least two of the three. Advanced integration allows natural language commands like “set the bedroom to 68 degrees” instead of just on/off control.
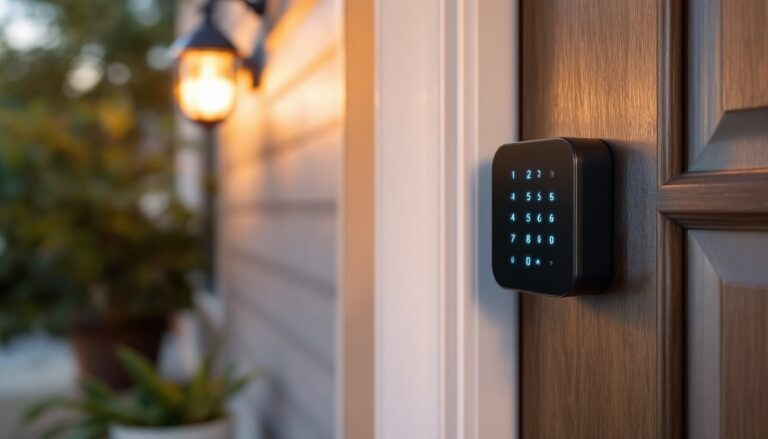
Some thermostats offer geofencing, which uses phone location to detect when occupants leave or approach home, automatically switching between away and home modes. This works best for single-person households or families who travel together.
Look for thermostats that don’t require subscription fees for basic features. Some manufacturers lock advanced scheduling or energy reports behind monthly paywalls, a frustrating surprise after installation.
Many experts testing Wi-Fi thermostats with color displays emphasize seamless app performance and reliable connectivity as make-or-break factors for long-term satisfaction.
Installing Your WiFi Smart Color Thermostat: A DIY Step-by-Step Guide
Most homeowners can install a WiFi smart thermostat themselves in 30-45 minutes with basic tools. But, systems requiring new wiring or involving high-voltage connections should be handled by an HVAC technician.
Safety first: Turn off power to the HVAC system at the breaker box before starting. Low-voltage thermostat wiring (typically 24V) won’t cause serious shock, but it’s still best practice. Wear safety glasses in case dust or debris falls when removing the old unit.
Materials and tools needed:
- New WiFi smart color thermostat with mounting plate and screws
- Screwdriver (usually Phillips head)
- Wire labels (often included with thermostat)
- Drill and level (if new holes are needed)
- Voltage tester (optional but recommended)
- Smartphone with the thermostat’s app installed
Step-by-step installation:
-
Photograph the existing wiring before disconnecting anything. This backup reference proves invaluable if labels fall off or confusion arises.
-
Label each wire as it’s removed from the old thermostat. Standard wires include R (power), C (common), W (heat), Y (cooling), G (fan), and sometimes O/B (reversing valve for heat pumps). Wire colors aren’t always standardized, so label by terminal letter, not color.
-
Remove the old thermostat from its mounting plate. Most snap or screw off. Check the wall behind it, if there are large holes or damaged drywall, the new thermostat’s base should be large enough to cover them. If not, minor patching may be needed.
-
Check for a C-wire. Most smart thermostats require continuous power via a common wire. If one isn’t present, options include running a new wire from the HVAC system (requires access to the air handler), using a C-wire adapter (sometimes included), or choosing a thermostat designed to work without one. This is the most common installation snag.
-
Mount the new base plate using the provided screws and anchors if installing into drywall. Use a level, a crooked thermostat looks sloppy and can make the touchscreen harder to read. Thread wires through the center opening.
-
Connect wires to terminals according to the manufacturer’s diagram and your labels. Most smart thermostats use push-in terminals that don’t require screwdrivers, just strip about 1/4 inch of insulation and insert. Gently tug each wire to confirm it’s seated.
-
Attach the thermostat to the base plate. It should click or snap into place. Some models use a magnetic mount.
-
Restore power at the breaker and wait for the thermostat to boot up. Initial setup usually involves selecting language, connecting to WiFi, and configuring system type (forced air, heat pump, etc.).
-
Run a test cycle for both heating and cooling (if applicable). The app will typically guide through this. Listen for the system to kick on and confirm air starts flowing from vents.
-
Complete app setup by creating schedules, setting temperature ranges, and enabling desired features like geofencing or learning mode.
When to call a pro: If the system uses high-voltage wiring (rare but present in some older baseboard heat systems), if no C-wire exists and running one means opening walls, or if the HVAC system doesn’t respond correctly during testing, contact an HVAC technician. Some jurisdictions require permits for thermostat replacement as part of broader electrical codes, check local requirements, though most don’t for simple swaps.
For those comparing installation experiences across different brands, ease-of-installation testing often highlights models with clear wiring diagrams and in-app setup walkthroughs as the most DIY-friendly.
Maximizing Energy Savings with Smart Scheduling and Automation
Installing a smart thermostat won’t save money by itself, the savings come from how it’s configured and used. The following strategies extract maximum value from the investment.
Start with an honest schedule audit. Most people overestimate how much time they spend at home. Track a typical week: when does everyone leave for work or school? When do they return? What time does everyone go to bed? Use this data to create a baseline schedule that reduces heating/cooling during unoccupied hours.
A common recommendation is the setback approach: during winter, drop the temperature by 7-10°F during sleep and work hours (e.g., 68°F occupied, 60°F away). In summer, raise it by the same margin (e.g., 72°F occupied, 80°F away). These setbacks can reduce HVAC runtime by 20-30% without noticeable comfort loss.
Use learning features intelligently. Many thermostats claim to “learn” patterns, but they need a few weeks of data. Don’t constantly override the schedule during this period, or it’ll learn the wrong patterns. After the learning phase, review what it’s doing and adjust any oddities.
Enable smart home integrations for deeper automation. If the thermostat works with door/window sensors, set it to pause heating or cooling when windows open. If it integrates with the lighting system, coordinate “away” modes so lights and HVAC respond together.
Leverage utility programs. Many power companies offer demand-response programs where they can slightly adjust thermostats during peak demand in exchange for credits or rebates. The adjustments are typically 2-3 degrees and last under an hour, barely noticeable to occupants.
Monitor humidity alongside temperature. Several WiFi color thermostats display indoor humidity. In summer, lowering humidity makes higher temperatures feel comfortable, reducing AC load. A setting of 72°F at 30% humidity feels much better than 72°F at 60% humidity. In winter, adding humidity (via a separate humidifier) allows comfortable temps at lower settings.
Review monthly energy reports provided by the app. These often break down runtime by system (heating vs. cooling) and compare usage month-over-month or against similar homes. Use this feedback to identify inefficiencies, if cooling costs spike even though moderate weather, it might signal ductwork leaks or aging equipment.
Don’t over-optimize. Constantly adjusting temperatures by single degrees creates marginal savings but annoys occupants. Find settings that balance comfort and cost, then let the automation work. The goal is efficiency, not deprivation.
Smart thermostats work best as part of a broader efficiency strategy. Pair them with proper insulation, sealed ductwork, and regular HVAC maintenance (filter changes every 1-3 months, annual professional tune-ups). A smart thermostat controlling a poorly maintained system won’t deliver promised savings.