Table of Contents
ToggleInstalling a smart video doorbell isn’t rocket science, but it does require some planning, especially if your existing doorbell wiring is older or nonexistent. The Wemo Smart Video Doorbell by Belkin has carved out a niche among HomeKit users who want end-to-end encrypted video and seamless integration with Apple’s ecosystem. This guide walks through everything from mounting hardware to app configuration, including the wiring quirks and setup steps that trip up first-timers. Whether replacing an old chime doorbell or starting fresh, this project takes about an hour with basic tools and a stable Wi-Fi signal.
Key Takeaways
- The Wemo Smart Video Doorbell features HomeKit Secure Video with end-to-end encryption, 1080p HD recording, and a 178-degree field of view without requiring a separate subscription beyond iCloud+.
- Installation requires a doorbell transformer rated 16-24V AC with at least 10VA, and the process typically takes 30-45 minutes with basic tools like a screwdriver, drill, and level.
- The Wemo doorbell works exclusively through Apple’s Home app and supports automations that integrate with HomeKit devices, such as flashing lights when someone rings or unlocking smart locks for recognized faces.
- Motion detection sensitivity and activity zones are customizable to reduce false alerts from passing traffic and street activity, with fine-tuning during the first week significantly improving performance.
- Ensure your Wi-Fi signal strength is at least -70 dBm with WPA2 encryption and at least 2 Mbps upload speed to avoid laggy video feeds and connectivity issues.
- Regular maintenance—including lens cleaning and monthly wipe-downs in coastal areas—and reviewing stored clips helps optimize face recognition accuracy and manage iCloud storage limits.
What Makes the Wemo Smart Video Doorbell Stand Out?
The Wemo Smart Video Doorbell differentiates itself with HomeKit Secure Video support, meaning video processing and face recognition happen locally on your iCloud account rather than Belkin’s servers. That encrypted footage stays private and doesn’t require a separate subscription for basic cloud storage, your iCloud storage plan handles it.
The unit records in 1080p HD with a 178-degree field of view, covering most porch approaches without fisheye distortion. Night vision uses infrared LEDs to illuminate up to 10 feet in darkness. Two-way audio lets users speak through the doorbell via the Home app on iPhone, iPad, or Mac. Motion detection triggers recordings and notifications, with customizable activity zones to avoid false alerts from passing cars or street traffic.
Unlike many competitors, Wemo doesn’t lock features behind a paywall. Motion alerts, live view, and recorded clips are all included once you have an active iCloud+ subscription (50 GB or higher). The doorbell works with Apple Home ecosystem devices, lights, locks, or HomePod speakers, allowing automation routines like “flash the hallway lights when someone rings the bell.”
Key Features and Specifications
Power Requirements: Hardwired installation requires an existing doorbell transformer rated for 16-24V AC and at least 10VA. Most homes built after 1990 have compatible transformers, but older systems may need an upgrade. The doorbell does not offer battery-powered operation.
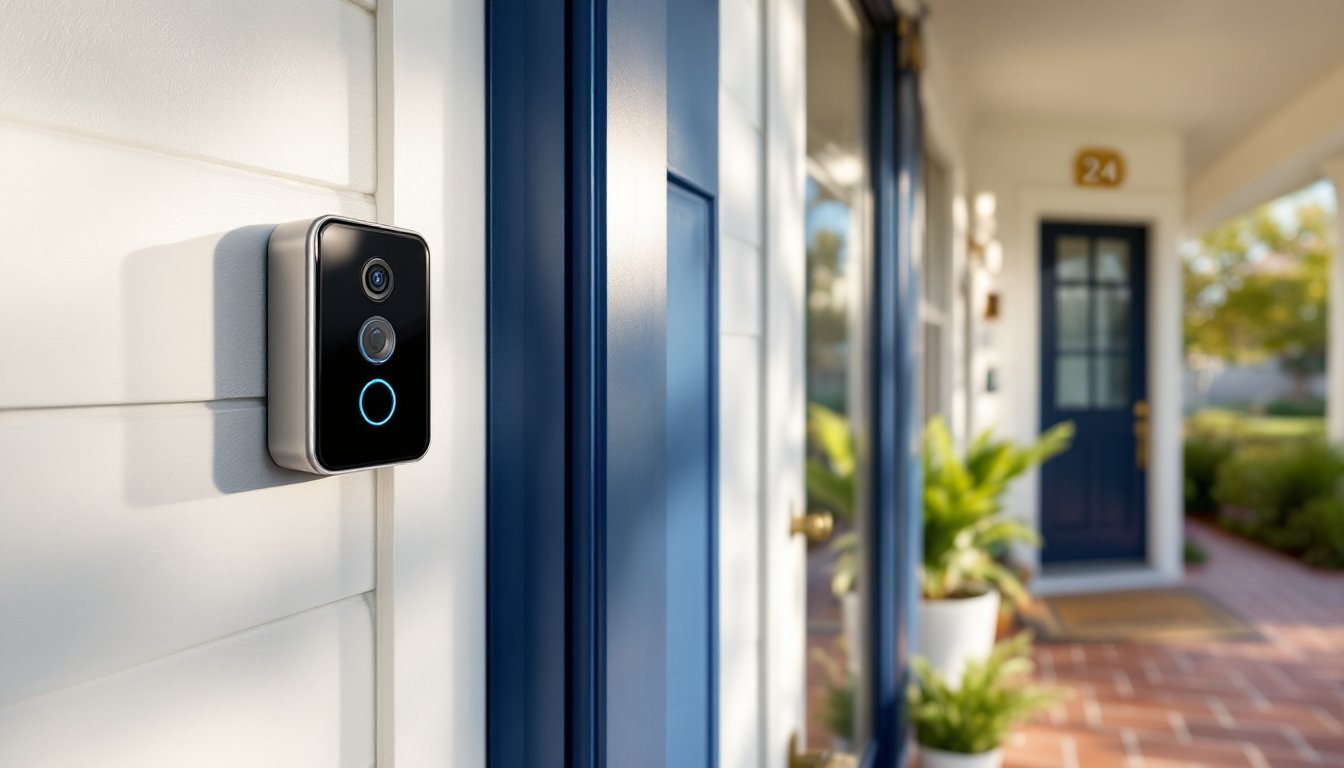
Dimensions: The faceplate measures 5.2 inches tall by 2.1 inches wide by 1.1 inches deep, fitting standard doorbell mounting plates. The included wedge mount provides a 15-degree vertical tilt if your door recess limits the camera’s view.
Connectivity: Dual-band Wi-Fi (2.4 GHz and 5 GHz) with WPA2 encryption. Requires iOS 13.2 or later for initial setup. Works exclusively through Apple’s Home app, no standalone Belkin app exists for this model.
Chime Compatibility: Works with most mechanical and electronic doorbell chimes rated 10-40VA. Digital or smart chimes may require a resistor (included in the box) to prevent hum or malfunction.
Weather Resistance: IP54 rating protects against dust and water splashes from any direction. Suitable for covered entryways: direct rain exposure over time may shorten lifespan.
Installing Your Wemo Video Doorbell: Step-by-Step Instructions
Safety first: Turn off power at the breaker box before touching any wiring. Doorbell voltage is low (16-24V), but it’s good practice. Wear safety glasses if drilling into masonry or stucco.
Tools and Materials Needed:
- Phillips screwdriver
- Flathead screwdriver (for wire terminals)
- Drill with 3/16-inch masonry bit (if mounting to brick or concrete)
- Wire stripper
- Voltage tester (optional but recommended)
- Level
- Pencil
1. Remove the old doorbell. Unscrew the existing doorbell button and disconnect the two wires. Label them if you’re uncertain, typically one comes from the transformer and one runs to the chime. Use a voltage tester to confirm power is off.
2. Check transformer compatibility. Locate your doorbell transformer (usually in the basement, garage, or near the electrical panel). Look for a label indicating voltage and VA rating. If it reads below 16V or 10VA, you’ll need to upgrade the transformer before proceeding. This is a straightforward swap but involves working near your main panel, call an electrician if you’re uncomfortable.
3. Mount the bracket. The Wemo doorbell includes a metal mounting bracket. Hold it against the wall or doorframe using a level to ensure it’s straight. Mark the screw holes with a pencil. Drill pilot holes if mounting to wood: use wall anchors for drywall or masonry screws for brick. Secure the bracket with the provided screws.
4. Connect the wiring. Strip about 1/4 inch of insulation from each wire if they’re not already exposed. Insert the wires into the two terminals on the back of the Wemo doorbell, polarity doesn’t matter. Tighten the terminal screws with a flathead screwdriver until the wires are secure. Give each wire a gentle tug to confirm it’s locked in.
5. Attach the doorbell to the bracket. Align the doorbell’s mounting slots with the bracket’s tabs and slide it into place. Use the included security screw (bottom of the unit) to lock it. This prevents casual theft.
6. Restore power. Flip the breaker back on. The doorbell’s LED ring will illuminate, indicating it’s receiving power.
Optional: Install the resistor for electronic chimes. If your existing chime buzzes or hums when the doorbell is idle, install the resistor included in the box. Disconnect power again, then wire the resistor in parallel with one of the chime’s terminals according to the included diagram.
Most installations take 30-45 minutes once you’ve confirmed transformer compatibility. If you’re replacing an existing wired doorbell, the process is plug-and-play. New installations without existing wiring require running 18-gauge wire from the transformer to the chime and from the chime to the doorbell, a more involved project that may need a second pair of hands.
Setting Up the Wemo App and Smart Home Integration
The Wemo Video Doorbell uses Apple’s Home app exclusively, there’s no Belkin app for this model. You’ll need an iPhone or iPad running iOS 13.2 or later and an active iCloud account.
1. Open the Home app. Tap the “+” icon in the upper right, then select “Add Accessory.”
2. Scan the HomeKit code. The eight-digit code is printed on a sticker inside the doorbell’s packaging and on the device itself (visible when you remove it from the bracket). Hold your iPhone near the code: the camera will recognize it automatically.
3. Follow the on-screen prompts. The app will ask you to assign the doorbell to a room (e.g., “Front Door”) and connect it to your Wi-Fi network. Enter your Wi-Fi password when prompted. The doorbell supports both 2.4 GHz and 5 GHz bands: 5 GHz is recommended for faster streaming if your router is within 30 feet.
4. Enable HomeKit Secure Video. After the doorbell connects, the app will prompt you to enable HomeKit Secure Video. This requires an iCloud+ subscription (50 GB supports one camera: 200 GB supports up to five cameras). Tap “Enable” and select your storage plan.
5. Configure motion settings. Tap the doorbell tile in the Home app, then tap the gear icon for settings. Under “Activity Zones,” draw boxes on the camera preview to designate areas where motion should trigger alerts. Exclude sidewalks or driveways if you only want notifications when someone approaches your porch. Adjust sensitivity, High catches all movement: Low ignores minor motion like swaying plants.
6. Set up automations. In the Home app, tap “Automation,” then “Create New Automation.” Choose “A Sensor Detects Something” and select your doorbell. Set actions like “Turn on entryway lights when motion is detected after sunset” or “Unlock the front door when a familiar face is recognized.” Automations require a HomePod, Apple TV, or iPad set up as a home hub.
The doorbell’s live feed appears in the Home app and on Apple Watch. Notifications arrive via push alerts when motion is detected or the button is pressed. Video clips are stored in iCloud for 10 days on the 50 GB plan (longer on higher-tier plans).
Troubleshooting Common Installation Issues
Doorbell won’t power on: Double-check your transformer voltage with a multimeter. It should read 16-24V AC. If it’s lower, the transformer is undersized. Also inspect wire connections at the doorbell terminals, loose wires are the most common culprit.
HomeKit code won’t scan: Clean the code sticker with a dry cloth and ensure good lighting. If the code is damaged, contact Belkin support for a replacement or manually enter the eight-digit code by tapping “Enter Code Manually” in the Home app.
Wi-Fi won’t connect: The doorbell must be within range of your router during setup, Wi-Fi signal strength of at least -70 dBm is recommended (check in your router’s admin panel). Move the router closer temporarily or use a Wi-Fi extender. Ensure your network uses WPA2 encryption: older WEP or open networks aren’t supported. Restart your router and try again.
Chime hums or buzzes: Install the resistor included in the box. Follow the wiring diagram in the manual, it connects in parallel with one terminal on your chime. If the hum persists, your chime may be incompatible: consider replacing it with a mechanical chime or a smart chime like the Wemo Chime Connector (sold separately).
Motion detection is too sensitive or not sensitive enough: Adjust the sensitivity slider in the Home app settings. Redraw activity zones to exclude areas with frequent non-relevant motion (trees, street traffic). Reviewers note that fine-tuning zones significantly reduces false alerts.
Video feed is laggy or freezing: Check your upload speed, Wemo recommends at least 2 Mbps upload for smooth streaming. Run a speed test on your phone near the doorbell. If speeds are low, consider upgrading your internet plan or moving your router closer. The 5 GHz band generally performs better for real-time video.
Doorbell offline after power outage: The unit should reconnect automatically when power is restored. If it doesn’t, power-cycle your router and wait 2-3 minutes. Check the Home app to see if the doorbell reappears. If it remains offline, remove it from the Home app and re-add it using the HomeKit code.
Maximizing Your Doorbell’s Performance and Features
Optimize camera angle: Use the included 15-degree wedge mount if your door is recessed or if the camera’s default angle misses the porch steps. The wide 178-degree field of view captures more than most competing doorbells, but aim it slightly downward to catch package drop-offs at ground level.
Leverage face recognition: HomeKit Secure Video learns familiar faces over time when you tag people in the Home app. After a week or two, the doorbell can notify you specifically when “John” arrives versus an unknown visitor. This feature improves accuracy with more iCloud storage (200 GB or 2 TB plans process faces faster).
Integrate with smart locks: Pair the doorbell with a HomeKit-compatible smart lock to unlock your door remotely when you see a trusted visitor on the live feed. In the Home app, create an automation: “When doorbell detects motion and face is recognized as [Name], unlock front door.”
Adjust video recording length: In the Home app settings, set recording duration from 10 seconds to 5 minutes per motion event. Longer clips drain iCloud storage faster but capture full interactions. If you’re hitting storage limits, shorten clips or upgrade your iCloud plan.
Use rich notifications: Enable rich notifications in iOS settings to see a live preview image when the doorbell detects motion or a button press. This lets you decide whether to open the full feed without unlocking your phone.
Maintain the hardware: Clean the camera lens every few months with a microfiber cloth to remove dust, pollen, or insect debris. The IP54 rating protects against splashes, but avoid power-washing the doorbell directly. If you live in a coastal area, wipe down the unit monthly to prevent salt corrosion on the faceplate.
Review stored clips regularly: Testing shows that reviewing clips helps refine activity zones and face recognition. Delete unnecessary clips to free up iCloud space or adjust motion sensitivity based on real-world performance.
Conclusion
The Wemo Smart Video Doorbell delivers reliable performance for Apple ecosystem users willing to invest in iCloud+ storage. Installation is straightforward if existing wiring meets voltage requirements: transformer upgrades or new wire runs add complexity but remain DIY-friendly with patience. Field reviews confirm the device’s sharp video quality and responsive notifications once Wi-Fi is properly configured. Spend time dialing in motion zones and automations during the first week, it pays off in fewer false alerts and smarter home routines.