Table of Contents
ToggleInstalling a smart thermostat shouldn’t require a contractor, and Ecobee makes it one of the more straightforward HVAC upgrades a homeowner can tackle in an afternoon. Most models work with conventional 24V HVAC systems, and the built-in installer guidance walks users through wiring step-by-step. This guide covers unboxing, installation, wiring, setup, programming, smart home integration, and troubleshooting for Ecobee’s current lineup, including the Premium, Enhanced, and Smart Thermostat models. Before starting, homeowners should confirm their system’s compatibility using Ecobee’s online checker and verify whether local codes require a licensed HVAC tech for thermostat replacement (most jurisdictions allow DIY low-voltage thermostat swaps, but always check).
Key Takeaways
- Ecobee smart thermostats are designed for DIY installation and work with conventional 24V HVAC systems, allowing homeowners to complete the upgrade in an afternoon with built-in installer guidance.
- Proper wiring is critical—always photograph the old thermostat setup, label each wire (R, W, Y, G, C), and verify correct terminal connections before powering the system to prevent installation failures.
- The Power Extender Kit (PEK) eliminates the need for a C-wire installation by pulling power from the furnace or air handler, making the Ecobee smart thermostat flexible for any existing system.
- Smart features like Smart Home/Away and Follow Me can reduce HVAC runtime by 20-25% compared to fixed schedules, while voice control integration with Alexa, Google Home, and HomeKit enables convenient remote adjustments.
- Most Ecobee troubleshooting issues stem from wiring errors or incorrect equipment profile settings rather than hardware defects, and resolving these two areas fixes approximately 90% of common problems.
Unboxing Your Ecobee: What’s Included in the Package
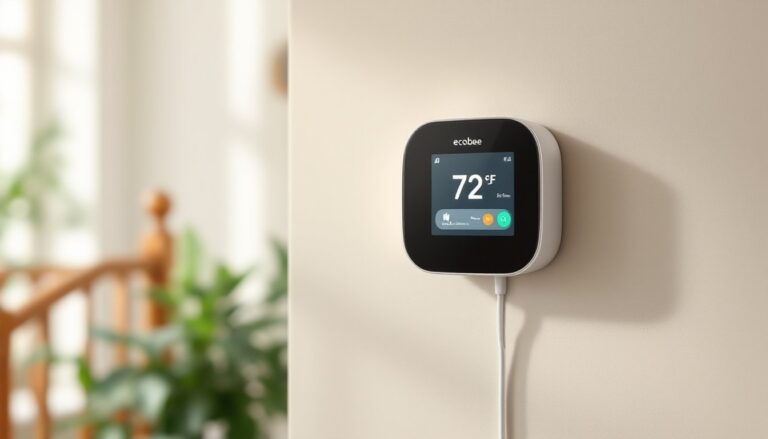
Every Ecobee package includes the thermostat unit itself, a backplate (to cover old wall marks), a power extender kit (PEK), wire labels, trim plate, installation hardware (screws and drywall anchors), and a quick-start guide. The PEK matters if the existing system lacks a C-wire (common wire), which provides continuous 24V power, the PEK pulls power from the furnace or air handler instead, eliminating the need for separate C-wire installation.
The Premium model also bundles a SmartSensor, which monitors temperature and occupancy in a different room to balance heating and cooling across zones. Enhanced and standard Smart Thermostat versions don’t include the sensor out of the box, but it’s sold separately and pairs via Bluetooth during setup.
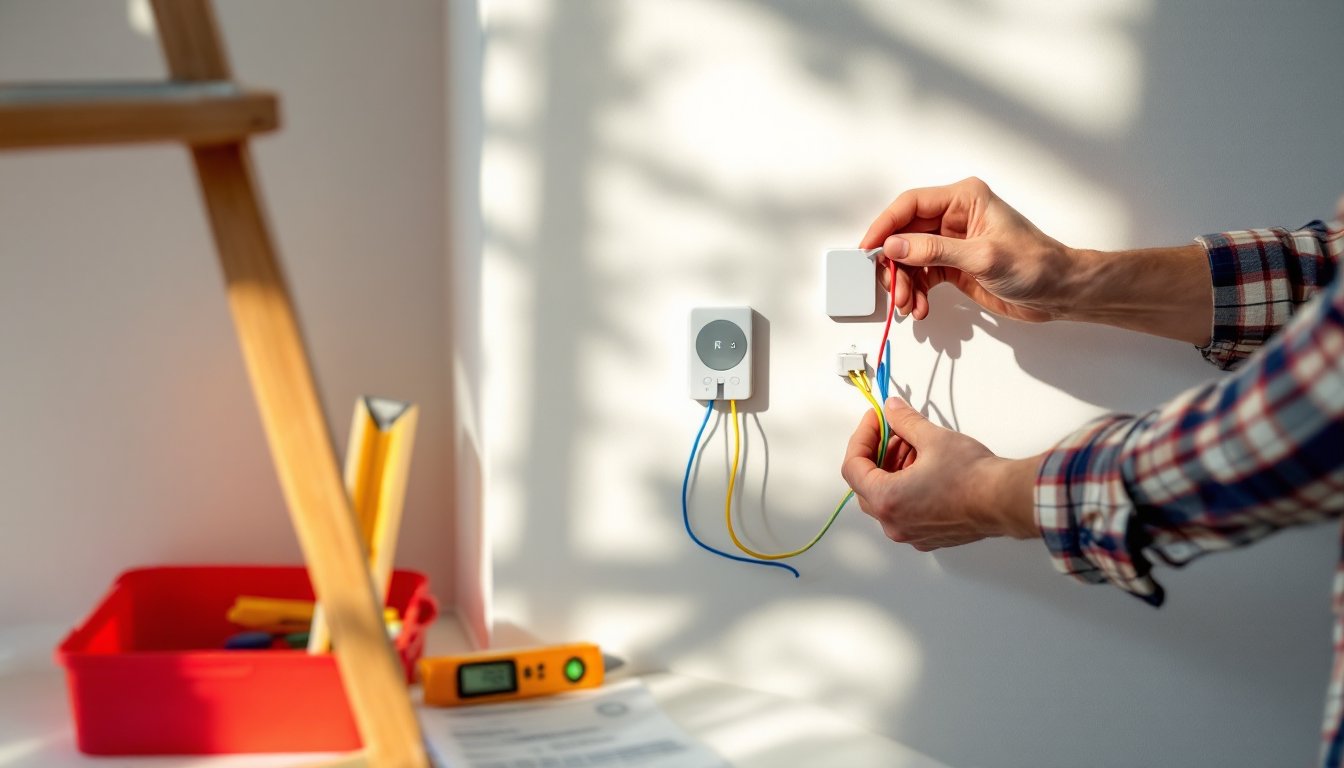
Before removing the old thermostat, take a clear photo of the existing wiring. Label each wire with the stickers Ecobee provides, most systems use R (power), W (heat), Y (cooling), G (fan), and C (common). If there’s no C-wire, the PEK installation happens at the furnace control board, not the wall. Don’t skip this step: reversed or unlabeled wires are the top cause of installation trouble calls.
Step-by-Step Installation Guide for Ecobee Smart Thermostats
Start by shutting off power at the breaker panel, confirm it’s off with a non-contact voltage tester before touching any wires. Low-voltage thermostat wires won’t shock most people, but cutting power to the HVAC system prevents accidental short circuits and protects the new thermostat’s circuitry.
Remove the old thermostat faceplate, then unscrew the backplate from the wall. Most are held by two screws into drywall anchors or a stud. Pull the wire bundle gently through the wall opening, there should be several inches of slack. If wires are brittle or frayed, trim back the damaged portion and strip 1/4 inch of fresh insulation with wire strippers.
Mount Ecobee’s backplate to the wall using the included screws. If the old screw holes don’t line up, use drywall anchors for a secure mount, thermostats aren’t heavy, but a loose backplate causes alignment issues and can stress wire terminals over time. Level the backplate before tightening screws: the thermostat screen looks crooked if the base is off by even a few degrees.
Once the backplate is secured, route labeled wires through the center opening and proceed to terminal connections. The installation process outlined by Tom’s Guide emphasizes double-checking terminal assignments before snapping the thermostat onto the backplate.
Wiring Your Ecobee Correctly
Match each wire to the correct terminal on the Ecobee backplate. Most residential systems follow this standard:
- R or Rc (red wire): 24V power from the transformer
- W or W1 (white wire): Heating control
- Y or Y1 (yellow wire): Cooling/compressor control
- G (green wire): Fan control
- C (blue or black wire): Common (continuous power)
If there’s no C-wire, install the PEK at the furnace or air handler. The PEK instructions show exactly where to connect its wires to the control board, typically the same terminals the thermostat wires connect to, plus two additional leads that tap into the transformer. This isn’t difficult, but it requires removing the furnace panel and working inside the unit. If that’s uncomfortable, hire an HVAC tech for the PEK installation: the thermostat wiring at the wall remains DIY-friendly.
For systems with separate heating and cooling transformers (Rh and Rc terminals), remove the jumper wire between R terminals on the Ecobee before connecting both wires. Dual-transformer setups are common in older homes with a boiler for heat and separate AC.
After all wires are seated in terminals, give each a gentle tug to confirm it’s locked in. Loose connections cause intermittent errors and can prevent the system from calling for heat or cool. Snap the thermostat onto the backplate until it clicks, then restore power at the breaker.
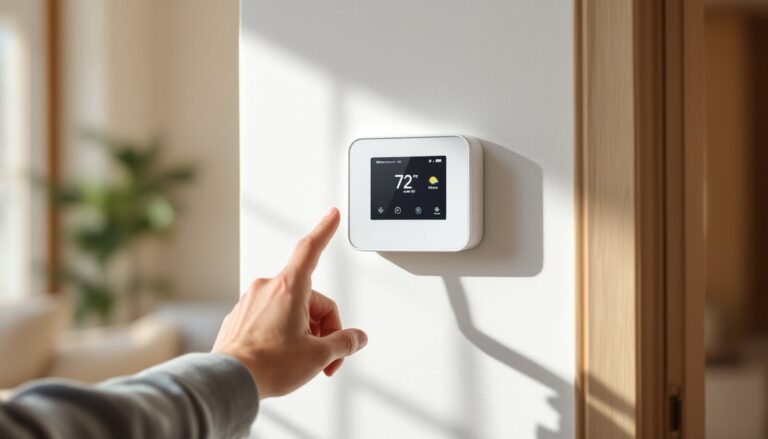
Navigating the Ecobee Interface and Initial Setup
When power is restored, the Ecobee boots up and walks through initial configuration. Select language, connect to Wi-Fi, and confirm the equipment profile (the thermostat auto-detects connected wires and suggests the system type, single-stage heat/cool, heat pump, multi-stage, etc.). If the suggested profile is wrong, manually select the correct one: this determines how the thermostat energizes heating and cooling stages.
Next, the thermostat runs a quick test of each component. It’ll call for heat, then cool, then fan-only. Listen for the furnace or air handler to respond, and verify the outdoor condenser kicks on during the cooling test. If anything doesn’t respond, recheck wire connections and the equipment profile settings.
Create an Ecobee account using the touchscreen or the mobile app (iOS/Android). The app mirrors all thermostat controls and allows remote adjustments, schedule edits, and usage reports. It also enables SmartSensor pairing, if a sensor was included or purchased separately, the thermostat discovers it via Bluetooth once the sensor’s pull-tab battery is activated.
Set the date, time, and zip code. Zip code matters because Ecobee uses local weather data for features like Smart Home/Away (which adjusts temperature when the house is unoccupied) and preheating or precooling before scheduled comfort periods. According to reviews covering app control and performance testing, these features can reduce runtime by 20-25% compared to fixed schedules.
Programming Schedules and Comfort Settings
Ecobee replaces traditional programmable schedules with Comfort Settings, predefined temperature profiles labeled Home, Away, Sleep, and custom options. Each Comfort Setting includes target temperatures for heating and cooling (for example, Home might be 72°F heat / 76°F cool, while Away is 65°F / 82°F).
The default schedule applies these Comfort Settings at specific times throughout the week. Tap Schedule on the home screen, then select a day to view or edit time blocks. Drag the edges of a block to adjust start/end times, or tap a block to change which Comfort Setting applies. Most users set Home during waking hours, Sleep overnight, and Away during work hours, but the interface allows as much granularity as needed.
Smart Home/Away overrides the schedule using occupancy sensors (built into the thermostat and any paired SmartSensors) and phone location (if enabled in the app). When everyone leaves, Ecobee automatically switches to the Away profile. This works well for households with irregular schedules, but users who prefer fixed setpoints can disable it in Settings > Preferences > Smart Home/Away.
Follow Me is another occupancy-based feature: the thermostat averages temperature readings from the rooms currently occupied (based on motion detected by sensors). If the kids are upstairs and the main floor is empty, Follow Me prioritizes upstairs comfort. This prevents overcooling unused spaces and smooths out hot/cold spots in multi-story homes.
For users who prefer manual control, holding the temperature dial on the home screen locks in a setpoint until the next scheduled transition (or indefinitely, if Hold Until I Change is selected). Vacation mode, accessible under Settings, holds the Away profile for a date range, useful for extended trips.
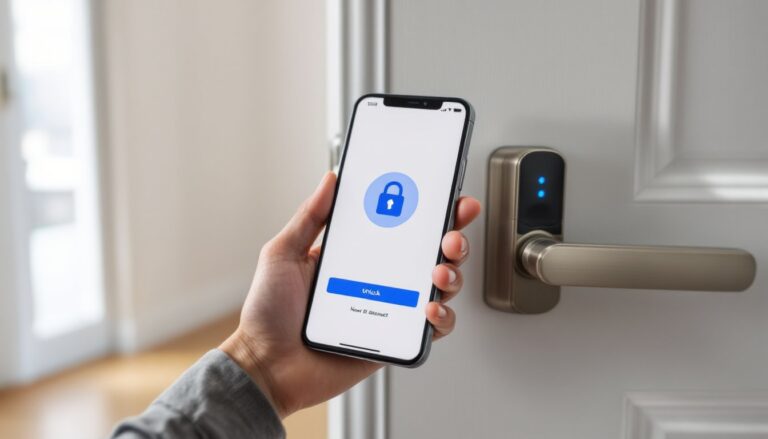
Integrating Your Ecobee with Smart Home Systems
Ecobee supports Amazon Alexa, Google Assistant, Apple HomeKit, Samsung SmartThings, and IFTTT out of the box. The Premium model includes Alexa built-in (with a speaker and microphone), so it doubles as an Echo device, users can ask it to play music, set timers, or control other smart home devices without pulling out a phone.
To link Ecobee to Alexa or Google Home, open the Alexa or Google Home app, go to Add Device, select Thermostat, and choose Ecobee. Sign in with the Ecobee account credentials, and the thermostat appears as a controllable device. Voice commands like “Alexa, set the thermostat to 70 degrees” or “Hey Google, what’s the temperature upstairs?” work immediately.
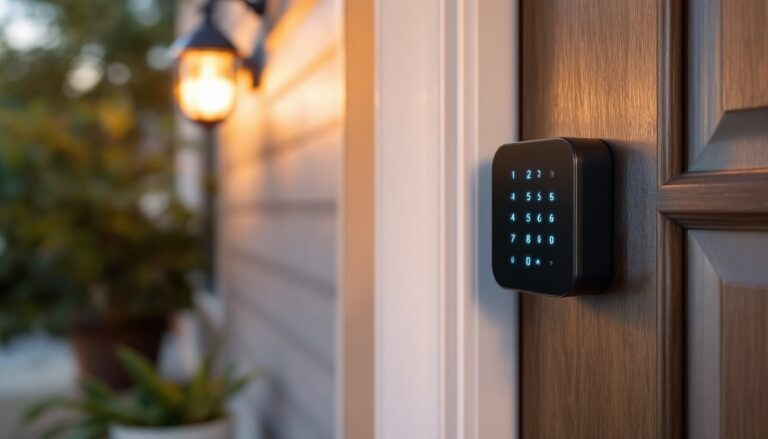
HomeKit integration requires scanning the HomeKit code printed on the back of the thermostat or in the installation guide using the iPhone Home app. Once added, Ecobee appears in HomeKit scenes and automations, for example, a “Good Morning” scene can raise the temperature, unlock the door, and turn on lights simultaneously.
SmartThings and IFTTT enable more complex automations. IFTTT applets can trigger Ecobee actions based on external events: if a connected weather station detects a temperature drop, switch to Home mode: if a door sensor shows the garage door open for 10 minutes, send a notification and bump up the Away setpoint. These integrations require linking accounts through the respective platforms’ Ecobee skill or channel.
Ecobee also connects to home energy monitors like Sense or Emporia, providing whole-home usage context. Users can correlate HVAC runtime with spikes in the energy dashboard and adjust schedules or setpoints to shave peak demand.
Troubleshooting Common Ecobee Issues
“No power to Rh wire” or similar alerts usually mean the C-wire isn’t delivering steady 24V, or the PEK installation needs adjustment. Use a multimeter to check voltage between R and C terminals at the thermostat backplate, should read 24V AC. If it’s lower or zero, recheck PEK connections at the furnace and verify the transformer is functioning.
Thermostat calling for heat/cool but system not responding: Confirm wire terminals are fully seated and the equipment profile matches the actual HVAC setup. If the system has a two-stage furnace but the profile is set to single-stage, the second stage won’t fire. Detailed reviews of setup and system matching note this as a common oversight during DIY installs.
Wi-Fi connection drops or “Unable to connect to Wi-Fi” errors: Ecobee connects to 2.4 GHz networks only (not 5 GHz). If the router broadcasts a combined SSID, split the bands or temporarily disable 5 GHz during setup. Router settings that block MDNS or UPnP can also interfere, check the router’s firewall settings and whitelist the Ecobee’s MAC address if needed.
SmartSensor not pairing or showing offline: Replace the CR2032 battery (sensors ship with a pull-tab that activates the included battery, but it may be low if the sensor sat in inventory for months). Move the sensor closer to the thermostat during pairing, Bluetooth range is typically 45 feet through open air but less through walls and floors. Once paired, the sensor communicates via the thermostat’s mesh network and range improves.
System short-cycling (turning on and off rapidly): This often indicates an oversized HVAC unit or incorrect staging settings. Check that Compressor Min Outdoor Temperature is set appropriately for heat pumps (usually 35-40°F: below this, auxiliary heat should take over). For furnaces, verify the heat stages match the equipment, calling two-stage heat on a single-stage furnace can cause relay chatter.
Alerts about exceeding auxiliary heat runtime: Heat pumps use electric resistance (aux) heat as backup when outdoor temps drop or the heat pump can’t keep up. Ecobee sends alerts if aux heat runs more than a threshold (default is 2 hours). This isn’t a malfunction, it’s telling the user the heat pump is working hard and energy costs are climbing. Adjusting the balance point (the outdoor temp at which aux heat kicks in) or improving home insulation can reduce aux runtime.
For persistent issues beyond these common fixes, the Ecobee support portal includes live chat and phone support, plus a detailed knowledgebase. Most thermostat problems trace back to wiring or equipment profile mismatches rather than hardware defects, so double-checking those two areas resolves 90% of trouble tickets.