Table of Contents
ToggleUpgrading to a smart thermostat is one of the simplest ways to cut energy bills while keeping a home comfortable year-round. Honeywell’s lineup of smart WiFi thermostats has matured into a reliable alternative to flashier competitors, offering straightforward controls, rock-solid compatibility with most HVAC systems, and scheduling features that actually adapt to real life. Unlike some brands that prioritize sleek design over function, Honeywell builds thermostats for homeowners who want proven performance without fighting their way through an app. This guide walks through the current Honeywell smart WiFi models, covers the installation process step-by-step, and explains how to squeeze real savings out of the features most people never touch.
Key Takeaways
- Honeywell smart WiFi thermostats offer broad HVAC compatibility with nearly every residential system, including older furnaces and complex dual-fuel setups, eliminating surprise compatibility issues.
- The Honeywell Home T9 flagship model uses up to 20 remote sensors to balance temperatures across multi-story homes, reducing energy usage by 15-20% compared to single-point thermostats.
- DIY installation typically takes under an hour; the most common mistake is a missing or improperly connected C-wire, which can be solved with a separate adapter kit.
- Adaptive scheduling and energy usage reports help homeowners identify system problems early and reduce heating and cooling costs by 10-20% when features are properly configured.
- Geofencing detects when residents leave home and automatically adjusts temperature without manual scheduling, while integration with voice assistants and utility demand response programs adds convenience and savings.
What Makes Honeywell Smart WiFi Thermostats Stand Out?
Honeywell smart WiFi thermostats earn their reputation through HVAC compatibility that extends to nearly every residential system on the market. While some competitors stumble with older furnaces, heat pumps, or multi-stage systems, Honeywell devices handle everything from basic single-stage gas furnaces to complex dual-fuel setups. That broad compatibility means fewer surprise returns after opening the box.
The geofencing functionality works reliably without draining phone batteries. The system detects when the last person leaves home and adjusts the temperature automatically, no manual scheduling required. It reverses the process when someone heads back, ensuring comfort without wasted runtime.
App interface design leans practical rather than flashy. The Honeywell Home app skips unnecessary animations and puts temperature adjustment, schedule editing, and system status front and center. Homeowners who’ve wrestled with overdesigned apps appreciate the straightforward layout.
Most Honeywell smart WiFi models support voice control through Amazon Alexa, Google Assistant, and Apple HomeKit. That triple compatibility matters for households that haven’t committed to a single smart home ecosystem. The thermostats also integrate with Samsung SmartThings and IFTTT for custom automation routines.
Top Honeywell Smart WiFi Thermostat Models to Consider
The Honeywell Home T9 remains the flagship for 2026, featuring remote smart room sensors that monitor temperature and occupancy in multiple spaces. This solves the common problem of a thermostat mounted in a hallway controlling comfort for a bedroom two rooms away. The T9 averages readings from up to 20 sensors, focusing on occupied rooms while ignoring empty ones. Testing by independent reviewers shows the T9’s remote sensor system effectively balances temperatures across multi-story homes better than single-point thermostats.
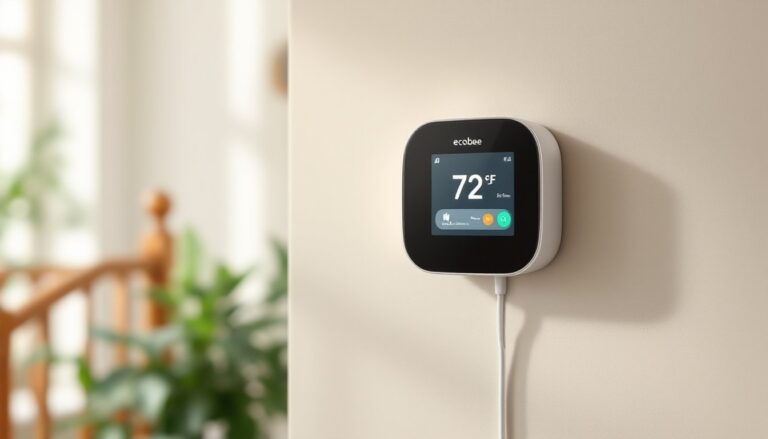
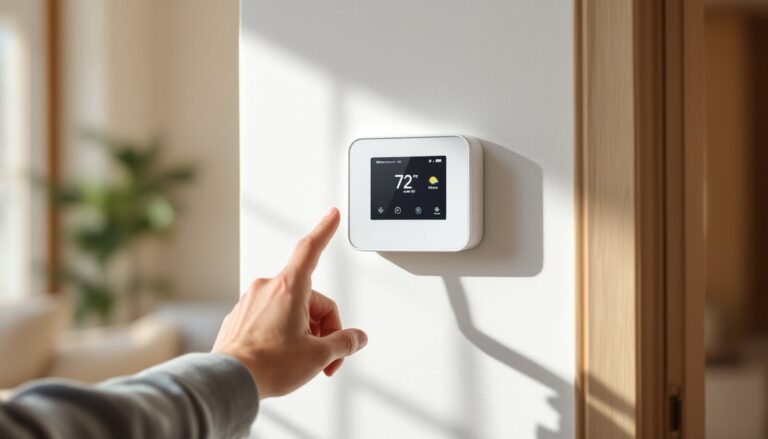
The T9 uses a standard rectangular design with a 3.5-inch color touchscreen. The display shows current temperature, humidity levels, and outdoor weather pulled from WiFi. Installation requires a C-wire (24VAC common wire) for power, a deal-breaker for homes with older thermostats that didn’t need continuous power. Honeywell sells a C-wire adapter kit separately, but routing the wire properly often requires opening the furnace panel.
Honeywell Home T6 Pro sits a step below the T9 in price and features. It lacks the remote sensor capability but still delivers WiFi control, geofencing, and voice assistant compatibility. The T6 Pro works well for smaller homes or single-story layouts where a centrally located thermostat provides adequate coverage. It also includes the same adaptive recovery feature that learns how long a heating or cooling system takes to reach target temperature, starting the system early enough to hit the scheduled time without overshoot.
Budget-conscious DIYers should consider the Honeywell Home T5+, which strips away the touchscreen in favor of physical buttons but retains full app control and scheduling. Comparisons across leading smart thermostat models consistently rank the T5+ as a solid entry point for first-time smart home users who don’t need room sensors or advanced humidity monitoring.
Step-by-Step Installation Guide for DIY Homeowners
Safety first: Turn off power to the HVAC system at the breaker panel before touching any wiring. Most furnaces also have a dedicated shutoff switch mounted nearby, flip both.
Remove the old thermostat by popping off the faceplate and unscrewing the backplate from the wall. Before disconnecting wires, snap a clear photo of the existing wiring configuration. Label each wire with the terminal letter it’s connected to using masking tape and a marker. Common terminals include:
• R or Rc (24VAC power, usually red wire)
• W or W1 (heating, usually white wire)
• Y or Y1 (cooling, usually yellow wire)
• G (fan, usually green wire)
• C (common, usually blue or black wire)
• O/B (reversing valve for heat pumps, usually orange)
If the existing thermostat has no C-wire but includes an unused wire bundled in the wall, that wire can often serve as the common. Pull the thermostat cable gently to check for slack, sometimes an extra wire sits coiled behind the drywall.
Mount the Honeywell backplate level on the wall using the included screws and anchors. Drywall anchors prevent sagging over time. Thread wires through the center opening and connect each wire to its matching terminal on the backplate. Tighten terminal screws firmly, loose connections cause intermittent power loss and erratic behavior.
Snap the thermostat body onto the backplate. Restore power at the breaker and furnace switch. The thermostat should boot up within 30 seconds. If the screen stays dark, double-check the R and C wire connections. A missing or improperly connected C-wire is the most common installation failure.
Permit requirements: Most jurisdictions don’t require permits for thermostat replacement since it’s considered low-voltage electrical work. But, if the installation involves running new wire through walls or modifying furnace wiring, local codes may apply. When in doubt, check with the local building department.
Setting Up Your Honeywell Home App and WiFi Connection
Download the Honeywell Home app from the Apple App Store or Google Play. Create an account or log in if already registered. The app walks through device setup with a straightforward wizard.
On the thermostat screen, navigate to Menu > WiFi Setup. Select the home WiFi network from the list and enter the password using the on-screen keyboard. 2.4 GHz WiFi networks work most reliably, many smart thermostats struggle with 5 GHz bands or mesh network handoffs. If the router broadcasts both frequencies under the same SSID, temporarily disable the 5 GHz band during setup, then re-enable it afterward.
Once connected, the thermostat displays a pairing code. Enter this code in the Honeywell Home app to link the device to the account. The app then prompts for system configuration: select the HVAC type (gas furnace, electric heat, heat pump, etc.) and number of stages. This information is usually printed on a label inside the furnace or air handler cabinet.
Geofencing setup appears next. Grant the app location permissions on the smartphone. Set the geofence radius, typically 1-7 miles depending on commute time. A smaller radius saves more energy but risks arriving to a cold house. Test the geofencing over a few days and adjust as needed.
For households with T9 models and remote sensors, press the sync button on each sensor while standing near the thermostat. The app detects each sensor and assigns it to a room. Name each sensor location clearly (“Master Bedroom,” “Kids’ Room,” “Basement”) since the thermostat uses these labels in scheduling rules.
Smart Features That Save You Money on Energy Bills
Adaptive scheduling learns household patterns over the first week or two. The thermostat tracks when people adjust temperatures manually and gradually builds a schedule that matches real behavior. This beats rigid programming that assumes everyone follows the same 9-to-5 routine.
Energy usage reports appear weekly in the Honeywell Home app, breaking down runtime by heating and cooling. The reports flag unusually long run cycles that might indicate a dirty filter, refrigerant leak, or failing equipment. Catching a struggling compressor early prevents a $3,000 replacement later.
Room sensor prioritization maximizes savings in homes with unused spaces. The app allows users to exclude specific rooms from the temperature average during certain times. For example, ignore the upstairs bedrooms during the day when everyone’s downstairs, then switch focus in the evening. Smart room sensor capabilities can reduce runtime by 15-20% compared to single-point thermostats in larger homes.
Temperature differential settings control how far the temperature must drift before the system kicks on. Widening the differential from 0.5°F to 1.0°F reduces short-cycling (starting and stopping frequently), which saves wear on the compressor and trims energy costs. Most people won’t notice the difference in comfort.
Integration with utility demand response programs allows the power company to make minor temperature adjustments during peak demand events in exchange for bill credits. Honeywell smart thermostats support these programs where available, typically saving $25-50 annually without noticeable discomfort.
Troubleshooting Common Issues and Maintenance Tips
“WiFi Disconnected” errors usually stem from router placement or interference. Smart thermostats have relatively weak WiFi radios compared to phones or laptops. If the thermostat sits on an exterior wall far from the router, consider adding a WiFi extender midway between them. Metal studs, ductwork, and brick can also block signals.
Temperature discrepancies between the thermostat and actual room feel often trace back to thermostat location. Mounting a thermostat on an exterior wall, near a window, above a heat register, or in direct sunlight throws off readings. Relocating a thermostat requires running new low-voltage wire, which means cutting into drywall. If relocation isn’t feasible, remote sensors solve the problem more easily.
Short cycling (system starts then stops after a minute) points to wiring issues or incorrect heat/cool configuration. Double-check that the thermostat settings match the HVAC system type. A thermostat set for conventional heating won’t control a heat pump properly. Verify all wire connections are tight, a loose Y wire causes erratic cooling behavior.
Battery warnings on battery-powered models indicate it’s time to swap in fresh AA batteries. Even thermostats with C-wires often include backup batteries that need replacement every 1-2 years. Ignoring low battery warnings can lead to a blank screen at the worst possible time.
Regular filter changes every 30-90 days (depending on filter type and household dust levels) keep the system running efficiently. Dirty filters force the blower motor to work harder, increase runtime, and waste energy. Honeywell thermostats can display filter change reminders based on runtime hours.
Firmware updates happen automatically when the thermostat connects to WiFi. These updates fix bugs, improve energy algorithms, and occasionally add new features. If the thermostat behaves oddly after an update, power-cycle it by pulling it off the backplate for 30 seconds, then reattaching.
Conclusion
Honeywell smart WiFi thermostats deliver tangible comfort and efficiency improvements without the complexity that plagues some competitors. Installing one ranks among the most accessible smart home upgrades, most homeowners complete the swap in under an hour. The real payoff comes from using the app’s scheduling and sensor features instead of treating it like a manual thermostat with WiFi tacked on. Properly configured, these devices trim 10-20% off heating and cooling costs while maintaining consistent comfort throughout the home.